What Is a Traffic Guidance Scheme (TGS)?

What Is a Traffic Guidance Scheme (TGS)

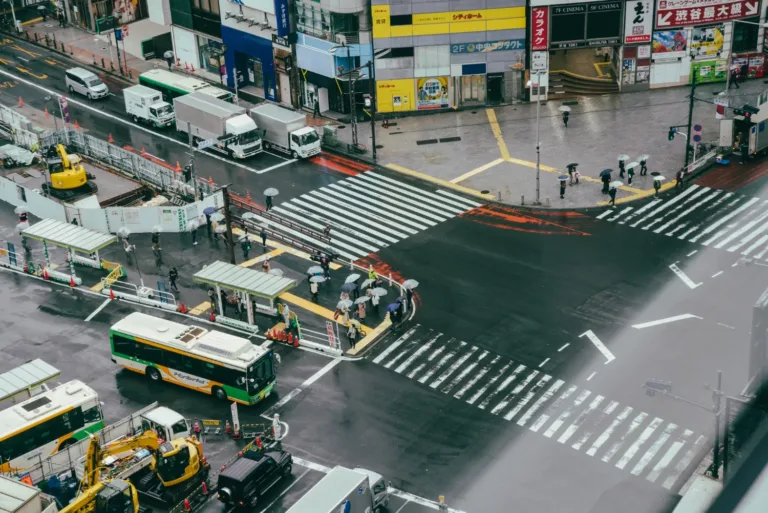
A Traffic Guidance Scheme (TGS) shows the temporary on-street layout that keeps people and vehicles safe while work happens on or next to a road or footpath. It places signs, cones, barriers and detours on a scaled drawing so crews can set up, maintain and remove the controls correctly.

When you need a TGS

You’ll typically be asked for a TGS when your work:

  • Enters the road reserve or narrows a lane.
  • Changes speed limits or closes a shoulder.
  • Affects footpaths, bike lanes or bus/tram stops.
  • Needs traffic controllers or requires night work.
  • Creates queues near schools, hospitals, events or busy retail strips.

Common requestors: local councils/road authorities, asset owners (water, power, telecoms), builders, utilities and event managers.

If you need the broader strategy that sits over your layouts, see Traffic Management Plans (VIC).

What a TGS includes

  • Site details: address, dates, work window, contact numbers.
  • Scaled layout drawing(s): north arrow, legend, dimensions, offsets from kerbs/lanes.
  • Devices: signs, cones, bollards, barriers, temporary fencing, lighting.
  • Advance warning & tapers: approach distances matched to speed environment.
  • Work area & buffers: lateral/longitudinal separation from live traffic.
  • Pedestrian & cyclist management: detours, temporary ramps, protected paths. For deeper guidance, visit Pedestrian Management.
  • Staging: setup → maintain → changeovers → pack-down.
  • Traffic controllers (if used): positions, two-way comms and hand signals.
  • Monitoring: who inspects, how often, what to record (photos, device counts).
  • Contingencies: wet-weather plan, breakdowns, incidents and emergency access.

TGS vs TMP vs TCP

TermWhat it isNotes
TGS (Traffic Guidance Scheme)On-street layout(s) showing temporary signs, cones, barriers and detours on a scaled drawing.Think: “how the site is set out today.” Used to set up, maintain and pack down.
TMP (Traffic Management Plan)Strategy and risk assessment above the TGS: purpose, risks, mitigations, approvals, responsibilities.The overarching plan (see Traffic Management Plans VIC).
TCP / PWZTMP / diagramsDifferent jurisdictions’ labels for layout drawings.In practice, serves the same purpose as a TGS.

Step-by-step: how to prepare a TGS

  1. Walk the site (or use fresh street imagery). Note speeds, lanes, sight lines, kerb uses, bus/tram/bike interfaces, driveways and pedestrian desire lines.
  2. Fix work windows & staging. Day vs night, weekend vs weekday, one stage or multiple.
  3. Choose the base layout. Shoulder works, lane closure, shuttle flow, detour, mobile convoy match to task, duration and speed.
  4. Protect people on foot and on bikes. Keep paths open where possible; if not, provide a clear, signed detour with ramps and barriers.
  5. Size the approach. Set advance warning distances, taper lengths and buffer zones for the posted speed.
  6. Specify devices & quantities. Signs, cones, barriers, beacons, temporary fencing; include a tally.
  7. Set monitoring & contacts. Who adjusts devices, when inspections happen, and how to escalate issues.
  8. Export cleanly. Scaled PDF with legend, north arrow, revision/date, page numbers and readable labels.

Approvals and permits (what to expect)

  • Sequence: draft → internal check → submit → authority feedback → revise (if needed) → approval.
  • Typical permits: road occupancy/works within road reserve, footpath closure, parking bay reservation, after-hours/night-work notifications.
  • Smooth-approval tips: readable scale (e.g., 1:200 or 1:500), consistent symbols, clear detours, visible driveway access, and an up-front staging note for changes across days/nights.

If your scope includes public events, see Event Traffic Management for permit sequencing and crowd interfaces.

Design essentials that keep sites safe

  • See and be seen: space advance signs so drivers have time to react; avoid placing signs behind trees or parked cars.
  • Safe tapers: build length rather than “pinching” traffic; hold the line with cones at uniform spacing.
  • Buffers matter: never trade away the safety zone for convenience.
  • Access management: keep emergency access clear; retain loading/driveway movements where safe.
  • Public transport interfaces: maintain stops if practical; if not, show temporary stop locations in the layout.
  • Night works: add lighting plans, glare control, and noise notes for residents.

Utility crews may also want Utility Works Traffic Planning for repeatable short-duration setups.

Special cases & quick playbooks

  • Mobile works (line marking/inspections): convoy with arrow board, short spacing, clear “END ROADWORK” after each hop.
  • Short-duration utility pits: repeatable layout with a laminated pre-start checklist; fast pack-down notes.
  • Intersections: consider turn bans; protect crossing pedestrians with extra marshals or barriers.
  • Crane/lift operations: sketch swing radius, exclusion zones and pedestrian re-routing. See Crane & Lift Traffic Planning.
  • Events: plan queueing, kiss-and-ride, accessible routes and crowd crossing points.
  • Schools & hospitals: schedule away from peaks; add extra controllers and slower temporary speeds where required.

Safety checks before you start (crew ready list)

  • Pre-start walk-through completed and hazards briefed.
  • Devices counted and in good condition; backup stock on site.
  • Sight distance confirmed to first sign and taper.
  • Pedestrian ramps seated, edges taped, no trip risks.
  • Contact list posted: supervisor, controller lead, tow/incident support.
  • Photo log started (setup, changes, pack-down).
  • As-built markup method agreed (paper or tablet).

Time and cost drivers (set expectations)

  • Complexity & stages: more stages = more drawings and setup time.
  • Speed environment: higher speeds need longer approaches and more devices.
  • Night works & controllers: labour and lighting add cost.
  • Revisions: unclear scopes and late changes create extra cycles.
  • Permits: authority fees and lead times vary by location and season.

Common mistakes (and quick fixes)

  • Signs too close together → Re-space for the speed; keep a clean message cadence.
  • Missing or tiny buffers → Restore minimum lengths; shift the work area if needed.
  • Unclear pedestrian detour → Add wayfinding at every decision point; use barriers, not cones, to separate.
  • Unreadable drawings → Increase scale, simplify text, remove cluttered notes.
  • Forgetting driveways/loading → Mark them on the plan; add access stewards at peaks.
  • No pack-down notes → Add stage change instructions and “END ROADWORK” placement.
Handy TGS templates

Copy-paste snippets for VIC TGS jobs

Use these as a starting point and edit for each site, speed environment and stage.

A) 12-point TGS checklist

Tick off before submission and prior to set-out on site.

  1. Scaled base map with north arrow
  2. Speed environment noted
  3. Advance warning sequence & distances
  4. Taper length and cone spacing
  5. Work area and buffer dimensions
  6. Pedestrian/cyclist treatment
  7. Public transport interface (if any)
  8. Driveways/loading access
  9. Device tally & notes
  10. Staging/pack-down sequence
  11. Monitoring frequency & photo log
  12. Site and after-hours contacts

B) Request email to an authority

Swap placeholders (in brackets) for your job specifics.

Editable email (rich text)
Subject: Temporary Traffic Guidance Scheme – [Site, Dates] Hi [Name], Please find the attached TGS for works at [address] from [dates/times]. The layout maintains [lanes/paths], provides a [detour or protected path] for pedestrians, and includes [controllers/lighting] as shown. Contacts: [Supervisor], [Phone]. Let me know if any adjustments are required. Kind regards, [Your name, role, company, phone]
Plain-text version (best for quick paste)
Subject: Temporary Traffic Guidance Scheme – [Site, Dates]
Hi [Name],
Please find the attached TGS for works at [address] from [dates/times]. The layout maintains [lanes/paths], provides a [detour or protected path] for pedestrians, and includes [controllers/lighting] as shown.
Contacts: [Supervisor], [Phone].
Let me know if any adjustments are required.
Kind regards,
[Your name, role, company, phone]

C) Device tally sheet

Add quantities and any notes per stage.

DeviceQtyNotes
PW signs___
Speed signs___
Cones___
Bollards / Barriers___
Arrow board / VMS___
Ramps / Plates___
Lights / Beacons___

TMP Approval in Victoria FAQs

If you’re within the road reserve or affecting footpaths/bike lanes, yes authorities usually expect a documented layout, even for short jobs.

A competent traffic management practitioner with current knowledge of local standards and permit processes.

Simple jobs may turn around quickly; complex or night works take longer. Build in lead time and allow for at least one revision cycle.

Only if the site conditions match (speed, lanes, sight lines, land uses). Otherwise, revise the layout.

Not always. Use them where visibility is limited, conflicting movements exist, or the authority requires them.

Pause, make the site safe, adjust the layout under the change protocol in your TMP, and update the as-built record.